- Your cart is empty
- Continue shopping
Settings
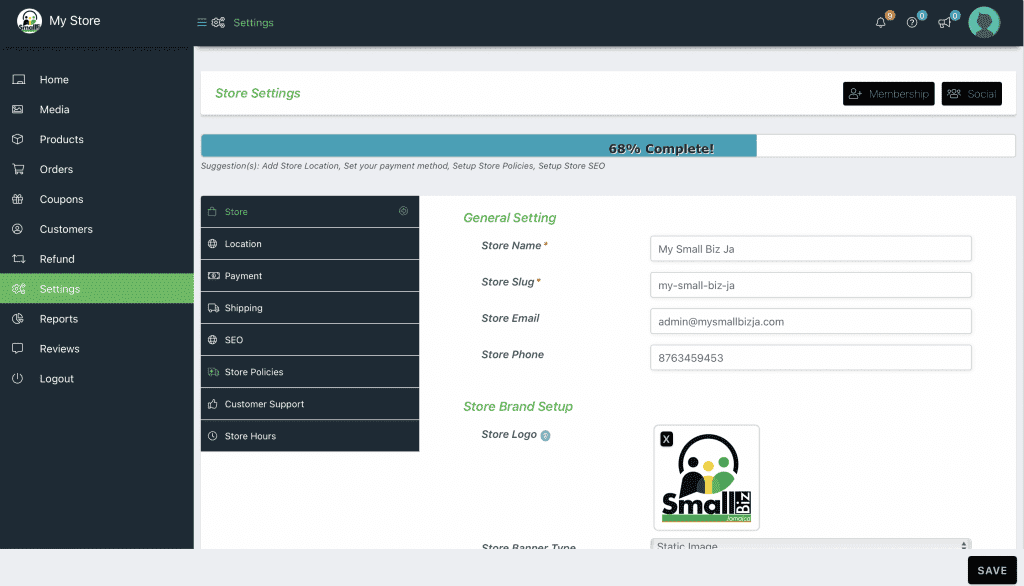
Click on Settings, then Store
Here you can edit your Store Name, Store Slug, Edit Your Store Contact Information and Change your Store Logo or Banner
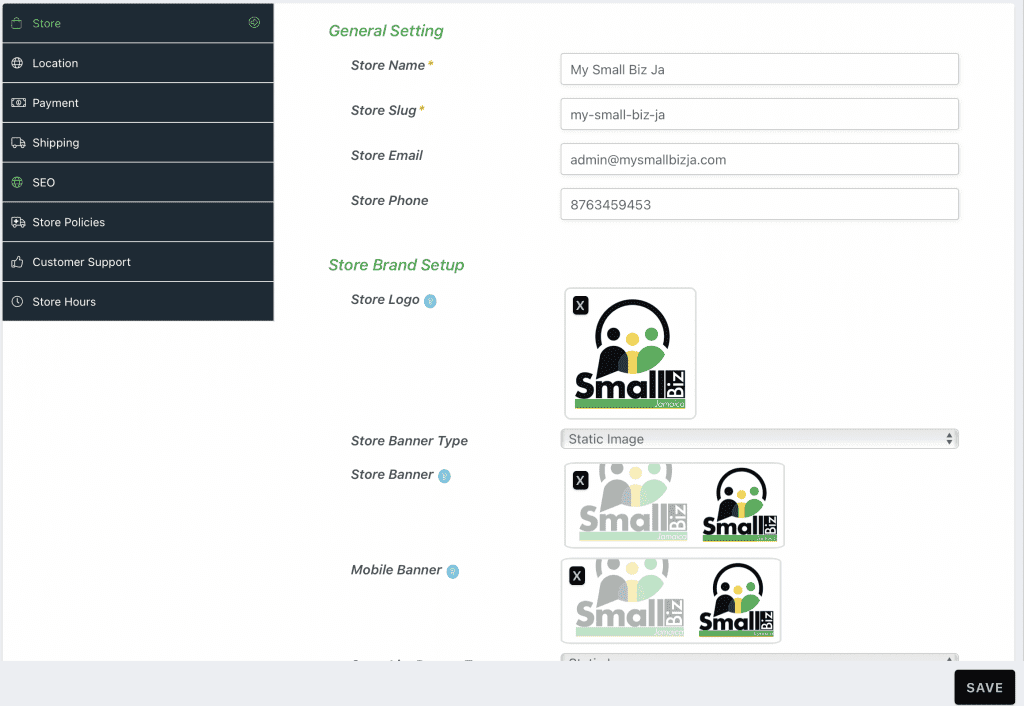
Remember to click Save after you have made any changes
Update Store Location #
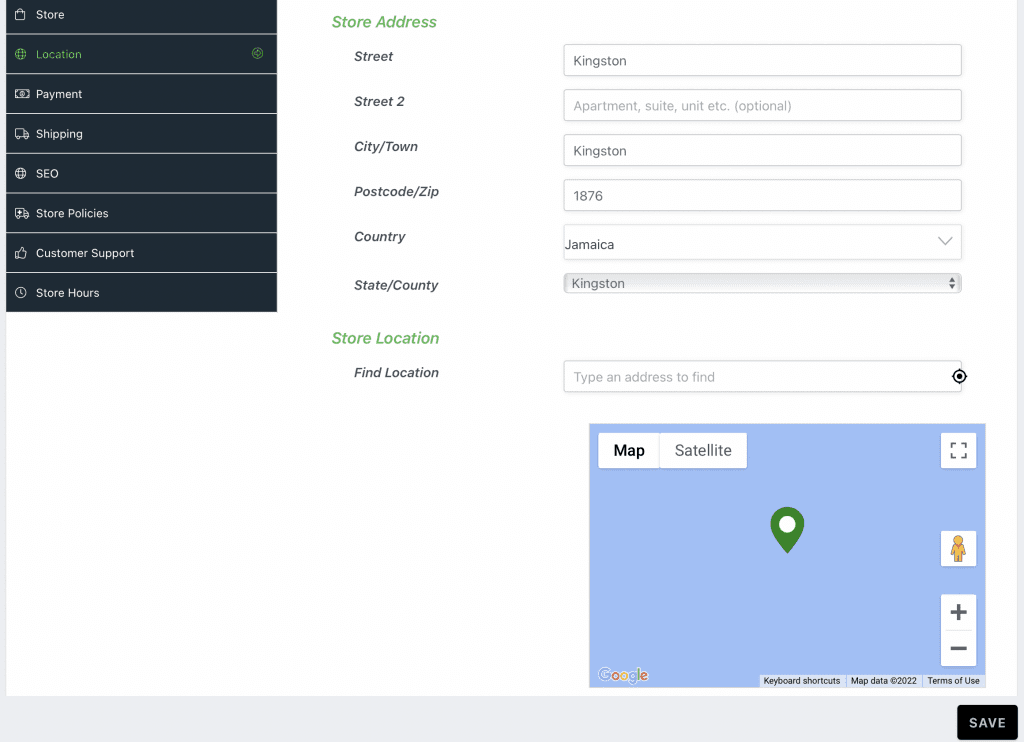
Click on Settings, then Location
Here you can update your Store Address and Add Your Store Location via Google
Payment #
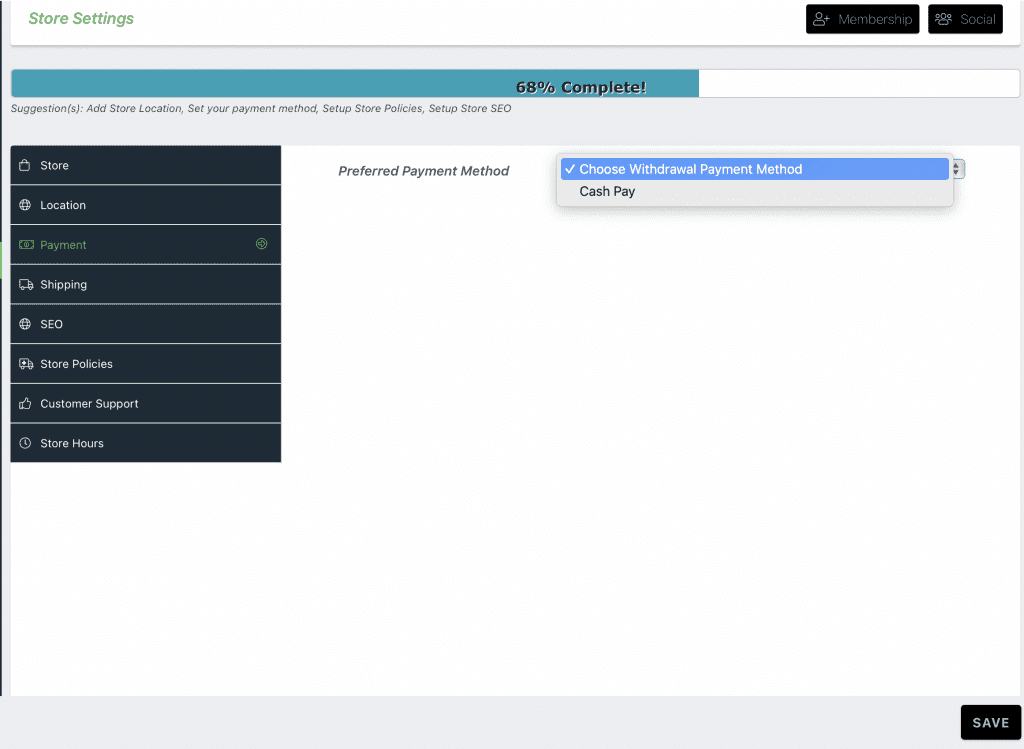
Click on Settings, then Payment
You can leave this on Cash Pay
Set up Shipping (Zip Mail, Knutsford, Bearer etc) #
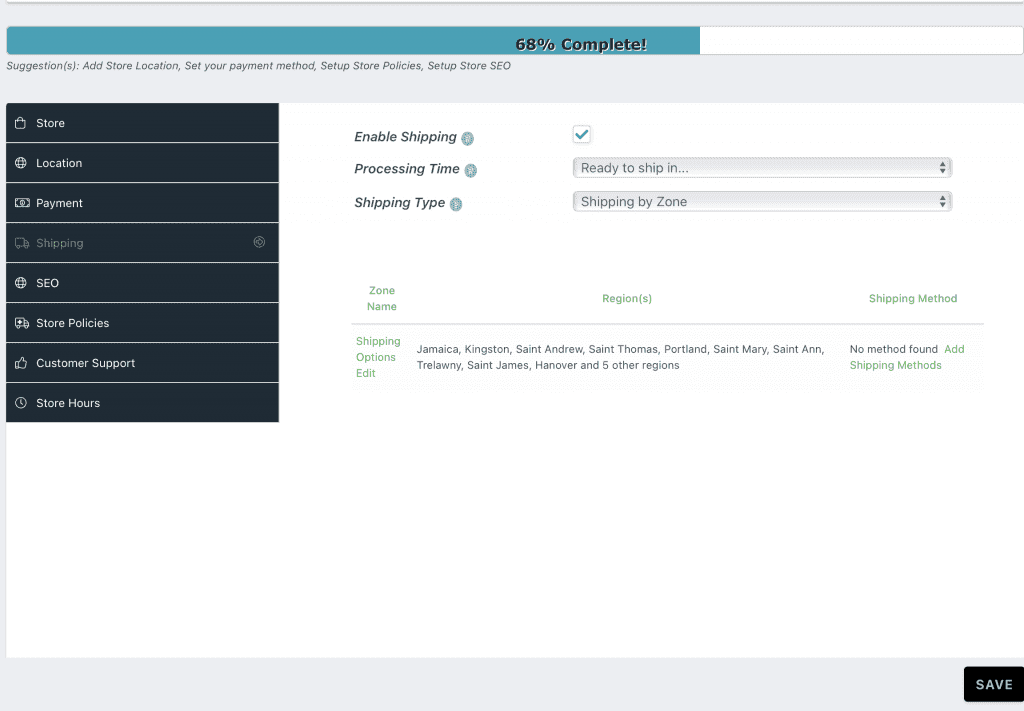
Click on Settings, then Shipping
Click Enable Shipping
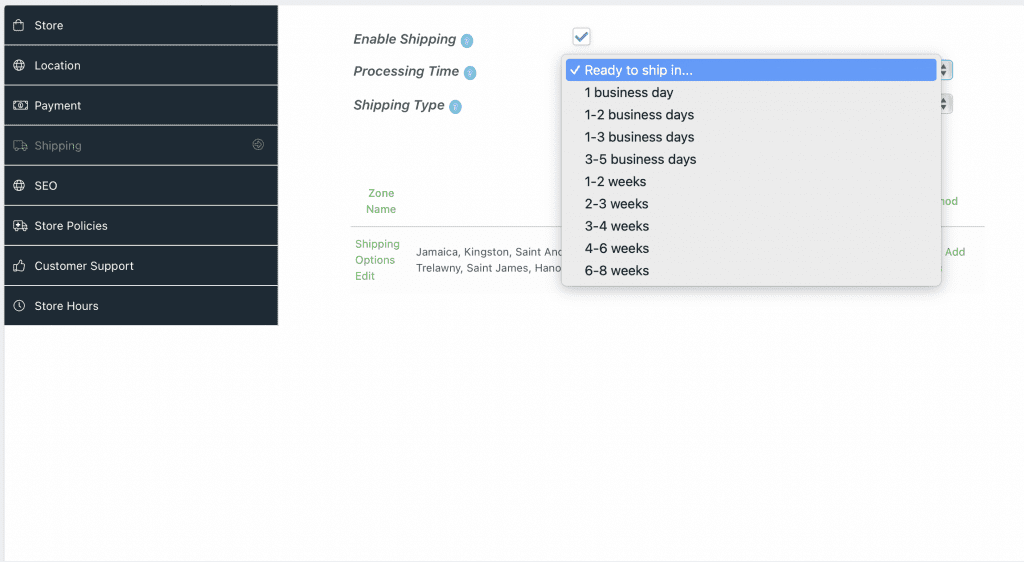
Under Processing Time : You can leave this as default or change it if you have products that take time to customise or make.
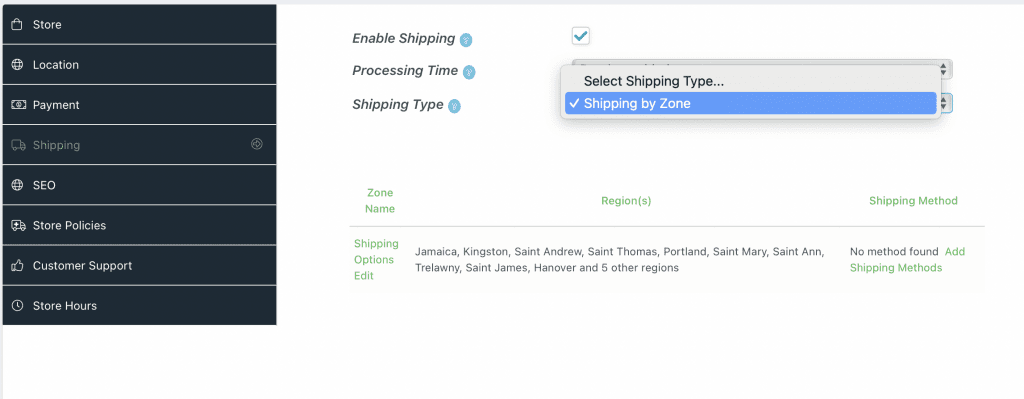
Under Shipping Type select ” Shipping by Zone“
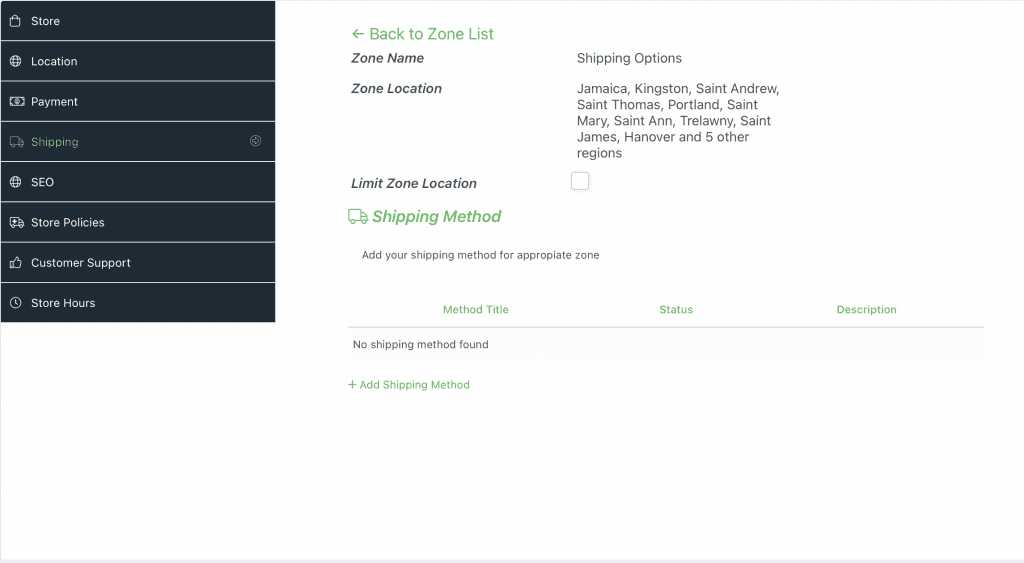
Click on Shipping Options then click “Add Shipping Method “

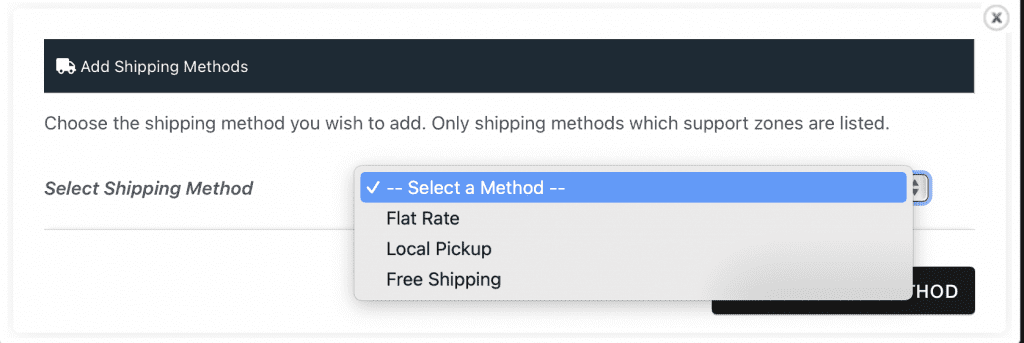
Click “Select a Method” then you can select “Flat Rate“
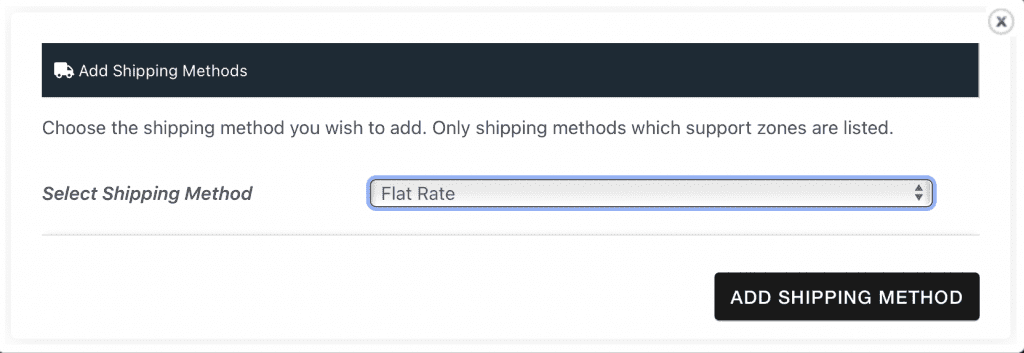
Click Add Shipping Method
Then Click “Edit” under Flat Rate to Change the Name

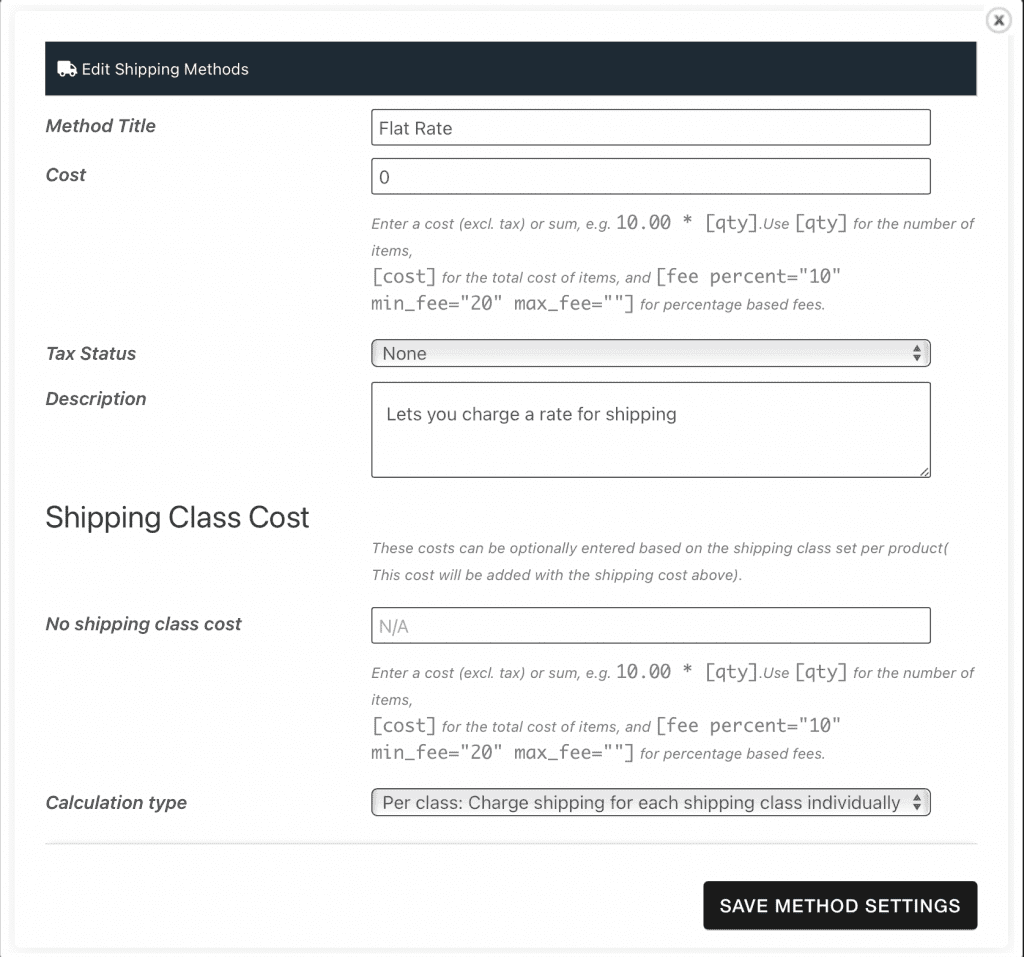
Edit the Method Title, Cost and Description to match your Desired Shipping Method
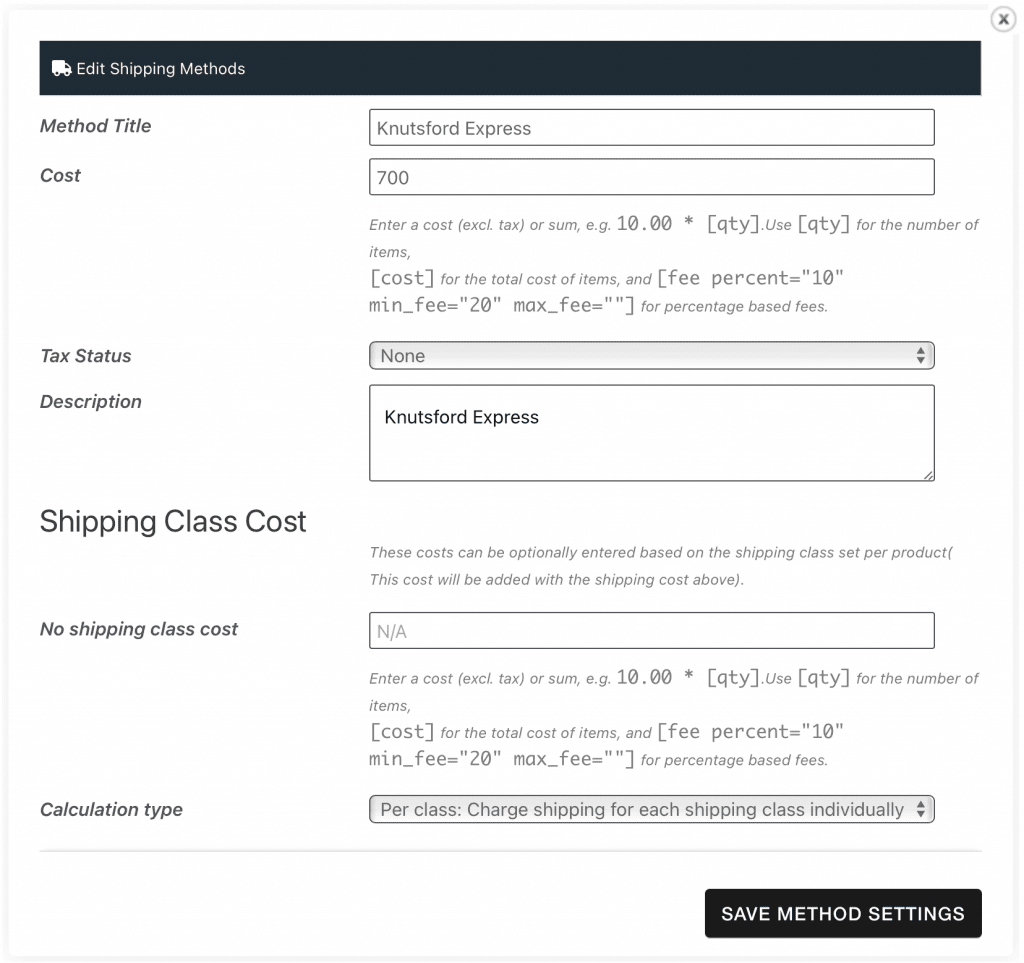
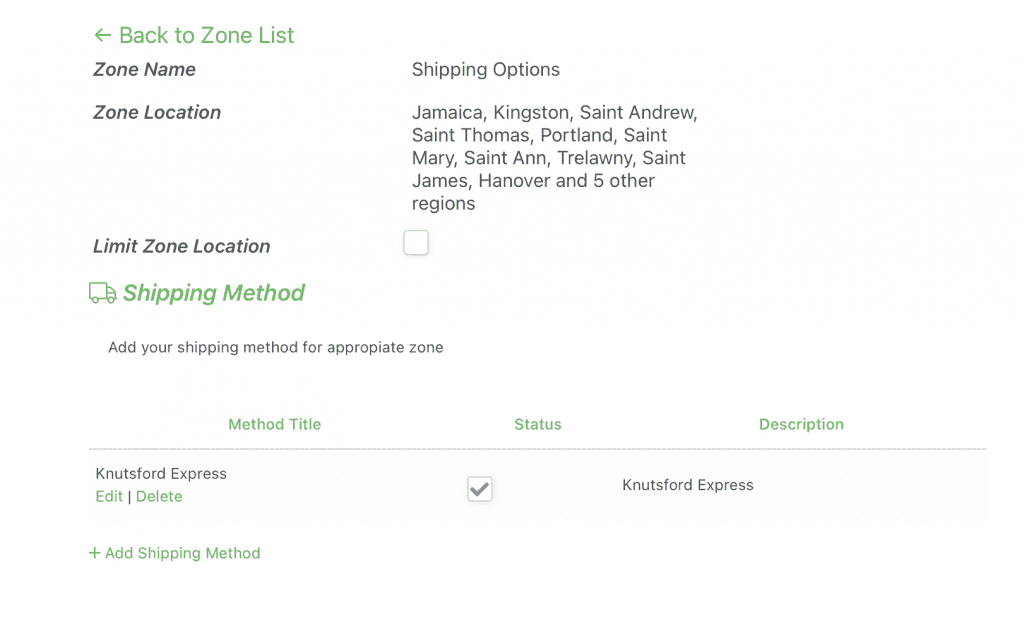
For Example: To offer Knutsford Express we change the Method Title , Cost and Description as seen here.
Then we click “Save Method Settings” and we see the Flat Rate is now Knutsford Express
SEO #
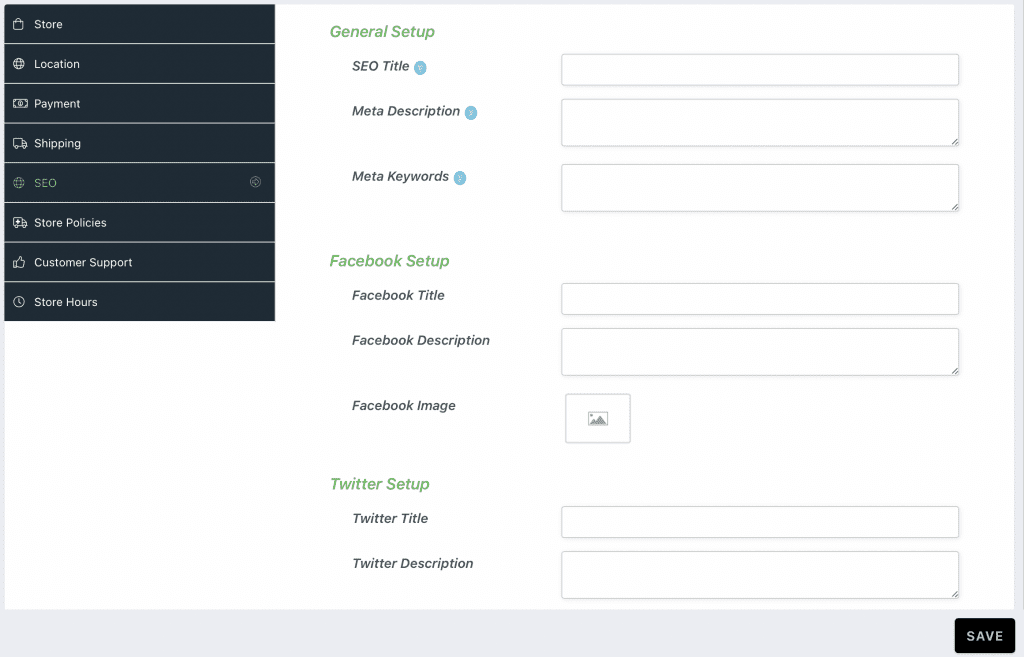
Click on Settings, then SEO
You may fill out the fields with your store details
Store Policies #
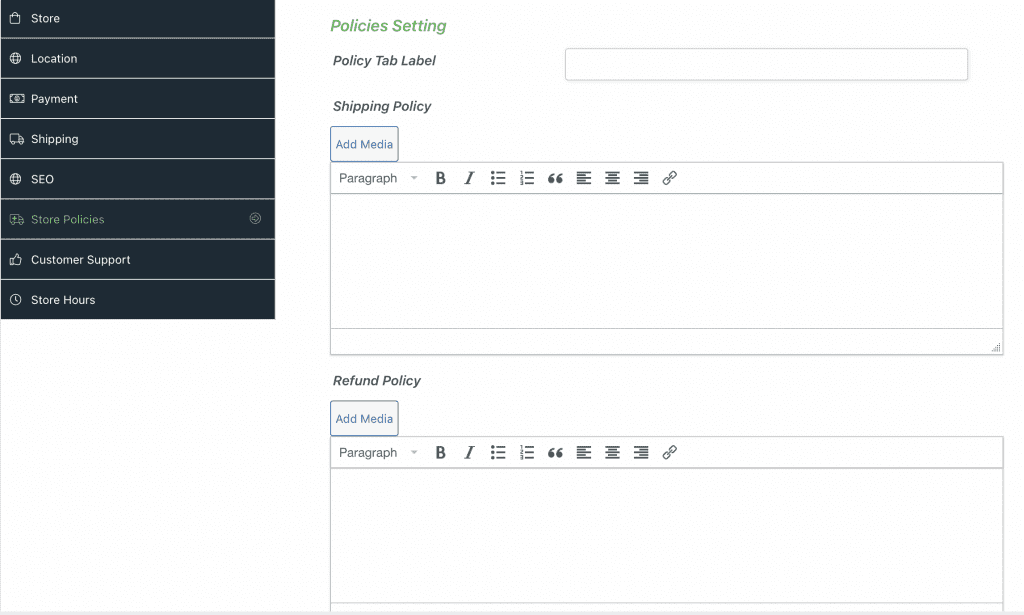
Click on Settings, then Store Policies
You can then add your Shipping Policy, Refund Policy and Cancellation Policy
Customer Support #
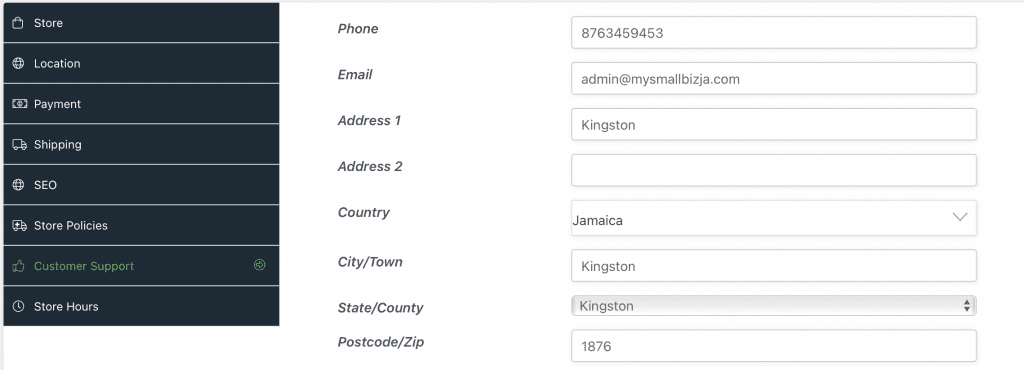
Click on Settings, then Customer Support
Here you can add your support email, and contact details.
Store Hours #
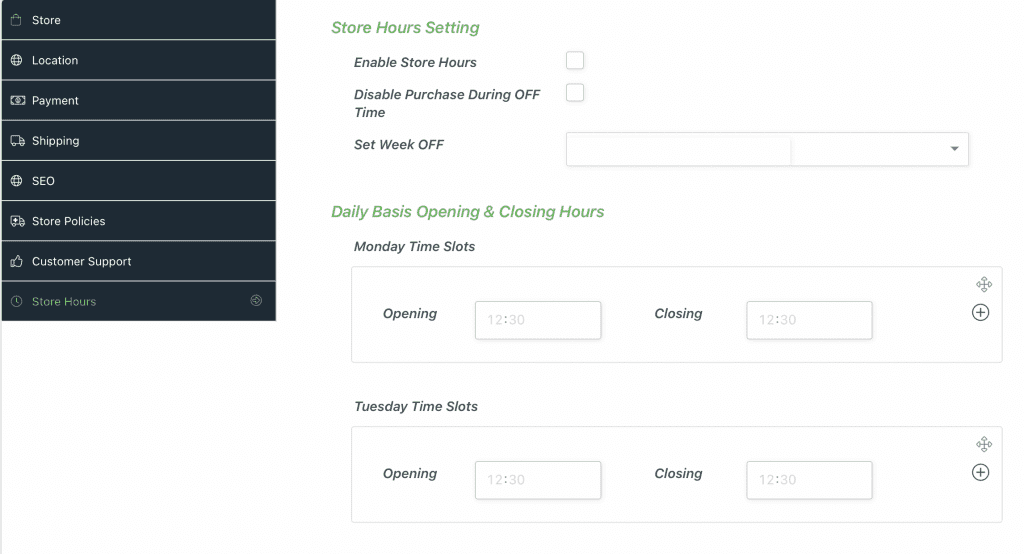
Click on Settings, then Store Hours
If you want to enable Opening and Closing times for your store you can add them here. Start by Clicking “Enable Store Hours”
You can Disable Purchase During Off Time– This means that customers will not be able to add your items to their cart if the store is closed.
If you are closed on particular days you can add these days under “Set Week OFF” so that customers will not be able to make purchases on those days.

Powered by BetterDocs


